Home / Paver sealing
Paver sealingPaver Sealing Cost
Quoted by the square foot, decided by the joints. What actually moves a paver sealing price, why two quotes on the same driveway can differ by three times, and the one paver driveway that should never be sealed at all.
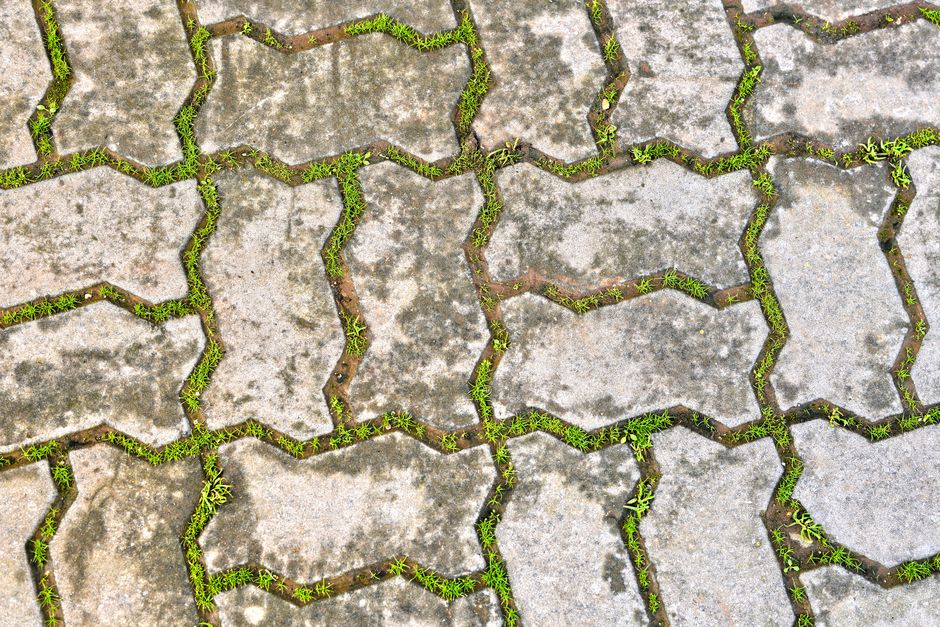
Sealing a paver driveway or patio is priced between $1.00 and $4.50 a square foot. On a two-car drive of 600–800 ft² that comes to $700 to $2,400. The band is unusually wide, and almost nothing that widens it is about area. The price is set by the joints — how many linear feet of them your paver size creates, how much sand has to go back into them, and whether a failed sealer has to come off first. And one paver driveway should not be sealed at any price: if yours is a permeable system, the open joints are the drainage.
Every other surface on this site is priced by its face. A wall is square feet of wall; a roof is square feet of roof. Pavers are the exception, and it is why paver sealing quotes are the least comparable numbers in exterior cleaning. Two crews can stand on the same 700-square-foot driveway, agree on the surface area to the foot, and come back with $900 and $2,400 — both of them honest.
The reason is that a paver drive is not one surface. It is a few thousand small ones with a sand-filled gap around each, and the gaps are the whole job. This page is about what sits in those gaps, what the crew has to do to them, and how each of those decisions shows up as money. If you have not yet worked out whether you own pavers, poured concrete or asphalt — three different trades, three different prices — settle that on our driveway sealing cost page first, because nothing below applies until you have.
First: is your driveway a permeable system? Because that one is not sealed
This is the only question on the page that can turn a quote into a mistake rather than an expense, and hardly any homeowner is asked it.
Some paver driveways and patios are built as drainage structures. The EPA describes the category plainly: alternatives to traditional pavement, “which include pervious asphalt, pervious concrete, interlocking pavers, and plastic grid pavers, allow rain and snowmelt to seep through the surface down to underlying layers of soil and gravel.” The units look like ordinary pavers from the kerb. The difference is underneath and between: an engineered stone reservoir below, and joints filled with open aggregate rather than fine bedding sand.
Three tells you can check yourself in under a minute. The gaps are wider than a standard joint and filled with small dark chippings, not soft grey sand you can scrape out with a key. There is no puddle anywhere on the surface after heavy rain, including in the low spots. And the drive often has no kerb or channel drain at the bottom of it, because it was never meant to shed water to the street.
If that is what you have, a film-forming sealer does not preserve it. UF/IFAS, writing on permeable pavement systems, identifies the failure mode directly: “the surface infiltration rate can diminish and result in imperviousness as sediments accumulate in the voids and clog the surface,” and it asks the people responsible for these systems to prevent “resurfacing of permeable pavements with impermeable materials that can negate their benefits.” Be precise about what that source says and what it does not: it is written about clogging and about resurfacing, not about a sealer bottle by name. But a coating that bridges the voids arrives at the same end by a shorter route, and the maintenance a permeable drive actually needs is the opposite of sealing — keeping the voids open, which for these systems means specialist vacuum work rather than a wet-look finish.
So ask any crew quoting your paver drive one question before you read their number: is this a permeable system, and how did you check? A crew that cannot tell the two apart is not the crew to put a coating on either one.
What the money is actually buying
Assuming a standard, sand-jointed paver drive, here is the same job broken into the lines a quote should contain. This decomposition is ours: the outer band of $1.00 to $4.50 a square foot is what crews across our coverage area publish, and the split below is our modelling of where inside that band a given driveway lands. It is labelled rather than presented as measured, in line with our methodology.
| Line | Typical cost | When it applies |
|---|---|---|
| Base seal on sound, freshly cleaned pavers | $1.00 – $1.50 / ft² | Joints full, no staining, nothing already coating the surface |
| Joint re-sand after the clean | $0.15 – $0.40 / ft² | Every job — cleaning takes sand out of the joints |
| Small units, or a herringbone or basketweave layout | add 10 – 25% | More joint length per square foot to refill and wet through |
| Named stain or efflorescence treatment | $75 – $300 per job | Oil, rust or white bloom that a general clean will not lift |
| Weeds, ant workings, settled or lipped units re-laid | $150 – $600 per job | Joints already lost; lifting and re-setting is masonry, not washing |
| Stripping a failed existing sealer | $1.00 – $2.50 / ft² | Cloudy, peeling, blotchy or slick finish already on the pavers |
| Second coat for a gloss finish | add $0.25 – $0.75 / ft² | Only where the product itself calls for one |
| Permeable paver system | Not priced here | See above — the answer is not a cheaper seal, it is no seal |
Read down that column and the spread stops being mysterious. A four-year-old drive of large rectangular units with full joints and no stains is a base-rate job. A twelve-year-old herringbone drive with weeds through it, ant heaps at the edges and a hazed coat of somebody else’s sealer already on top is four separate pieces of work, and the second quote is not padding — it is the first quote plus three things the cheap one did not look for.
The joints decide the price, and paver size decides the joints
Here is the arithmetic that no cost calculator applies. Joint length per square foot is a function of unit size, and it rises fast as units get smaller. Halve the dimensions of a paver and you roughly double the linear feet of joint in the same driveway — twice the sand to buy and place, twice the perimeter for the sealer to wet through, and, on a job priced by the hour underneath a per-foot number, real extra time.
That is why a drive of large 12-by-18 slabs and a drive of small cobble-format setts are not the same purchase at the same square footage, and why a herringbone or basketweave pattern costs more to seal than a running bond of the same unit. If you are comparing two quotes on two different driveways, compare the joints, not the areas.
Re-sanding is not an upsell inside this. Washing a paver surface hard enough to clean it lifts sand out of the joints, and the sand is a structural component — it is what stops the units migrating under a car. A sealing quote with no re-sand line has either not planned for it or has planned to leave the joints short. Whether the extra liquid stabiliser is worth buying on top is a separate argument, and the industry’s own answer to it lives on our driveway sealing page rather than being repeated here. What is worth knowing on this page is what a stabiliser is actually for: the Concrete Masonry & Hardscapes Association (CMHA), whose remit covers interlocking concrete pavement, says its “primary function reduces the risk of removal of joint sand from flowing water, wind, aggressive cleaning, tire action and intrusion of organic matter, seeds and insects,” and notes that some liquid stabilisers “are made of the same materials as sealers, but with a higher solids content.” That last clause explains a lot of quoting behaviour: on some jobs the two products in the van are near relatives, which is exactly why they should be two priced lines and not one word.
The clean that comes first can change the colour of your pavers
Sealing always follows a clean. What is specific to pavers — and genuinely surprising to most owners — is that the cleaning chemistry is not colour-neutral.
CMHA is blunt about the products that lift the white bloom off concrete pavers: “many cleaners effective in removing dirt and efflorescence are a mix of detergent and acid,” and “cleaners with strong acids will change the color of the pavers slightly.” Slightly, and permanently, and then you seal it in. This is the strongest practical argument for the test patch nobody asks for: pick an inconspicuous corner, let the crew clean it with the product they intend to use, and look at it dry the next day before the rest of the drive gets the same treatment.
It also sets a sane expectation about the machine. The same document describes professional practice as a pressure washer paired with an applicator, working “between 1,000 and 4,000 psi” at “a rate between 2 and 6 gallons/minute,” with the flow set to rinse properly. Notice that the range is wide at the bottom as well as the top. Flow does as much of the work as pressure here, and a crew that arrives intending to run everything at the top of that band on a fifteen-year-old drive is likely to leave you paying for sand.
One free instruction from the same source, worth more than it sounds: “turn off all automatic sprinkler systems during cleaning, sealing and drying.” An irrigation zone that fires overnight onto a curing sealer is one of the commonest ways a good job ends up blotchy, and it costs nothing to prevent.
How it goes down is most of whether it lasts
Two crews can apply the same product to the same driveway and get results that diverge within a year. The variables are method, quantity and traffic, and CMHA is specific on all three.
On method: sealers are often applied with a foam roller, but “the use of a squeegee to spread the sealer will avoid pulling joint sand out of the joints,” and the sealer should be allowed to stand in the chamfers and soak in, with “penetration into the joint sand… at least 3/4 inch.” That is the difference between a coating that locks the joints and one that sits on the tops of the units looking finished.
On quantity: “generally only one coat is required,” and where a product does call for two, the first is applied to saturation and “a light second coat, if needed, can be applied for a glossy finish” — with a real warning attached: “be careful not to over apply the sealers such that the surface becomes slippery when cured.” More sealer is not more protection. On a sloped drive it is a hazard, and it is the second-coat upsell that most deserves a question.
On timing: for water-based products needing two coats, “always apply the second coat while the first coat is still very tacky,” and afterwards “prevent all traffic from entering the area until the sealer is completely dry, typically 24 hours.” A day without the car on the drive is part of the specification, not an inconvenience the crew invented. If a quote does not tell you how long you are off the surface, that is a question, not an omission you should fill in yourself.
If there is already sealer on it, you are buying a different job
The single largest jump in a paver quote is not size, stains or pattern. It is the coat that is already there.
A sealed drive cannot simply be sealed again once the old finish has gone cloudy, blotchy or slick, because the new product has nothing sound to key into — you would be laying a good coat over a failing one. Stripping is a separate operation with its own chemicals, its own dwell, its own rinse and its own disposal problem, and it can cost as much as the seal that follows it. That is the honest reason a first-time seal and a re-seal are not the same quote.
Two things follow. First, when you buy the first seal, ask what re-sealing this product will look like in four years — whether it wears back gracefully or has to be removed. Second, if a quote for a previously-sealed drive contains no stripping line and no assessment of the existing finish, the crew has either judged the old coat sound (fine, ask them to say so in writing) or has not looked.
The three questions that move the number most
Not a red-flag list. Three specific things to say out loud on the driveway, each of which changes the price for a reason you can check:
- “Is this a permeable system?” If yes, stop; the correct answer is maintenance that keeps the joints open, not a sealer.
- “How much sand is going back, and is it priced separately?” This is the line that scales with your paver size and pattern, and the one most often folded invisibly into a per-foot rate.
- “Is there sealer on here now, and does it need stripping?” The answer is worth more than every other variable on the page combined.
Ask those three and two quotes become comparable, which is the whole problem with a single per-square-foot number on a surface that is mostly edges. Around Tallahassee, where shaded brick and paver drives under the canopy oaks grow back into their joints quickly, we point readers to the Capital City crew we recommend for paver cleaning, re-sanding and sealing. Outside north Florida, every metro we cover is listed further down this page. And if what you want this year is the wash without any coating on top of it, that job is priced on its own at driveway cleaning cost.